- February 2013 (2)
- April 2013 (1)
- May 2013 (1)
- June 2013 (4)
- July 2013 (11)
- August 2013 (2)
- September 2013 (2)
- October 2013 (2)
- December 2013 (1)
- January 2014 (9)
- February 2014 (6)
- March 2014 (10)
- April 2014 (7)
- May 2014 (8)
- June 2014 (7)
- July 2014 (3)
- August 2014 (15)
- September 2014 (10)
- October 2014 (7)
- November 2014 (2)
- December 2014 (6)
- January 2015 (3)
- February 2015 (6)
- March 2015 (6)
- April 2015 (5)
- May 2015 (5)
- June 2015 (3)
- July 2015 (1)
- September 2015 (1)
- October 2015 (1)
- November 2015 (7)
- December 2015 (7)
- January 2016 (12)
- February 2016 (7)
- March 2016 (9)
- April 2016 (8)
- May 2016 (5)
- June 2016 (6)
- July 2016 (8)
- August 2016 (8)
- September 2016 (5)
- October 2016 (7)
- November 2016 (1)
- December 2016 (6)
- January 2017 (3)
- February 2017 (3)
- March 2017 (1)
- June 2017 (1)
- July 2017 (1)
- August 2017 (2)
- September 2017 (3)
- November 2017 (1)
- December 2017 (1)
- January 2018 (1)
- February 2018 (1)
- May 2018 (1)
- June 2018 (3)
- August 2018 (3)
- September 2018 (3)
- October 2018 (5)
- November 2018 (2)
- January 2019 (1)
- February 2019 (2)
- March 2019 (3)
- April 2019 (3)
- May 2019 (5)
- June 2019 (2)
- July 2019 (4)
- August 2019 (5)
- September 2019 (5)
- October 2019 (5)
- November 2019 (3)
- December 2019 (6)
- January 2020 (6)
- February 2020 (4)
- March 2020 (7)
- April 2020 (5)
- May 2020 (4)
- June 2020 (3)
- July 2020 (5)
- August 2020 (5)
- September 2020 (4)
- October 2020 (7)
- November 2020 (4)
- December 2020 (3)
- January 2021 (3)
- February 2021 (5)
- March 2021 (8)
- April 2021 (4)
- May 2021 (5)
- June 2021 (7)
- July 2021 (4)
- August 2021 (5)
- September 2021 (3)
- October 2021 (2)
- November 2021 (2)
- January 2022 (2)
- February 2022 (1)
- March 2022 (2)
- April 2022 (1)
- May 2022 (4)
- June 2022 (6)
- July 2022 (6)
- August 2022 (5)
- September 2022 (4)
- October 2022 (3)
- November 2022 (1)
- December 2022 (1)
- January 2023 (3)
- February 2023 (2)
- March 2023 (5)
- April 2023 (3)
- May 2023 (3)
- June 2023 (5)
- July 2023 (1)
- August 2023 (1)
- September 2023 (3)
- October 2023 (2)
- January 2024 (2)
- February 2024 (4)
- April 2024 (2)
- May 2024 (2)
- June 2024 (19)
- July 2024 (3)
- August 2024 (1)
- September 2024 (4)
- October 2024 (4)
- November 2024 (4)
- December 2024 (2)
- January 2025 (1)
- February 2025 (3)
- March 2025 (1)
- April 2025 (1)
- May 2025 (3)
- June 2025 (3)
- July 2025 (1)
- August 2025 (2)
- September 2025 (1)
- October 2025 (1)
- November 2025 (4)
- December 2025 (1)
- January 2026 (4)
- February 2026 (3)
- March 2026 (1)
How to Take Great iPhone Photos of Food
Friday, January 9, 2015
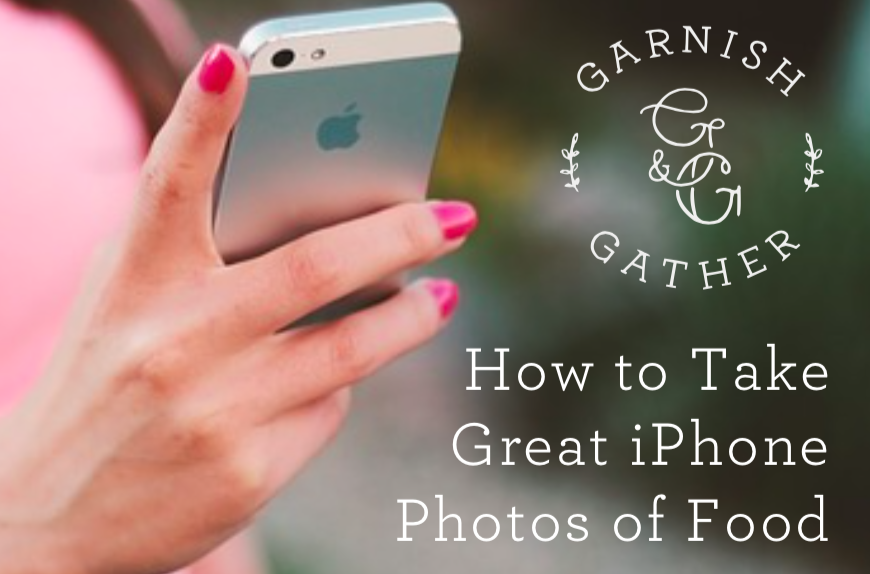
Whether you're creating a masterpiece at home or photographing a beautifully plated dish at your favorite restaurant, these tips will get you the best shot of your meal! Because who doesn't love to reminisce on delicious past meals? If you're snapping a shot of your Garnish & Gather meal, don't forget to tag us... you might just find a sweet treat to say 'thanks for sharing' in your next meal!
1. Wipe your lens
With your phone in your hands, pockets, purses, or wherever, it’s really easy to get junk on your phone’s camera lens. Use your shirt, a tissue, or a soft cloth to gently wipe off your lens before taking a photo.
2. Think about composition & context
If your object isn’t going to be in the dead center of the photo, one of my favorite guidelines is the rule of thirds. Imagine a grid made from two vertical and two horizontal lines (as shown). Some phones and cameras have the grid already on the screen. The rule suggests that the composition is better if the object is in line with any of the lines or the corners of the central square.

You also want to show the viewer the context of your photo. Be careful not to zoom in too closely, or it can be difficult to tell what you’re showing. Add utensils for scale, or zoom out to show the table scape (cups, napkins, multiple plates, centerpieces, etc.).

3. Tap to focus & set exposure
On most touchscreen phones, changing the focus of a photo is as easy as a tap of your finger where you want the camera to focus. For iPhones, the exposure is also set this way. Tap lighter areas to make the photo darker and vice versa.
4. Use natural light
The best light is natural light. Indirect light near a window is my go-to spot for photographing food. Try to avoid backlit photos (where the light source is behind the object) unless you’re specifically going for a silhouette shot. If you are taking a photo in artificial light, try to only use one light source to avoid lots of hot spots and crazy shadows.

5. Get creative with your plating
Instead of just plopping the food down on the plate in separate piles, get creative with the way you layer the food. The best way to get ideas is to imitate plating you see at restaurants or from photos on social media and food blogs. A garnish of fresh herbs or cheese often adds a nice touch. Try to choose a plate or serving dish that won’t compete with the food in color or pattern. Plain white plates are often a good choice.

6. Look for an interesting background
Maybe you have a cool side table, beautiful marble countertops, a neat tray, or pretty table linens. Look for interesting surfaces that might enhance your photo. One of my favorite places to take my food photos is on an antique ironing board that is a side table in my living room. If the perfect spot for lighting isn’t an appealing background, use a tablecloth, placemat, or tray to cover it up.
7. Don’t get crazy with the angles
I’ve found that the best shots are almost always directly overhead or straight on in front of the object. It’s ok to be creative, but odd angles can make your photos difficult to read.
8. Use apps to edit
There’s not shame in a little bit of editing. My favorite app is VSCOcam. You can straighten crooked photos, crop, edit lighting, and add (tasteful) filters. This app (and many others) allows you to upload directly to social media.

BONUS: Warm your plates
While you’re busy snapping photos, your food can get cold quickly. So warm your plates in a cool oven (150-200°F), microwave, or warming drawer. This helps keep your food warm longer whether or not you’re sharing on social media.
Other Posts You'll Love